What are Templates?
Templates are pre-built, ready-to-install tool collections for popular APIs and services. Each template includes a set of fully configured tools — endpoint URLs, parameter definitions, auth setup instructions, and response mappings — all ready to use. Instead of configuring every field manually, you install a template and start making API calls in under two minutes.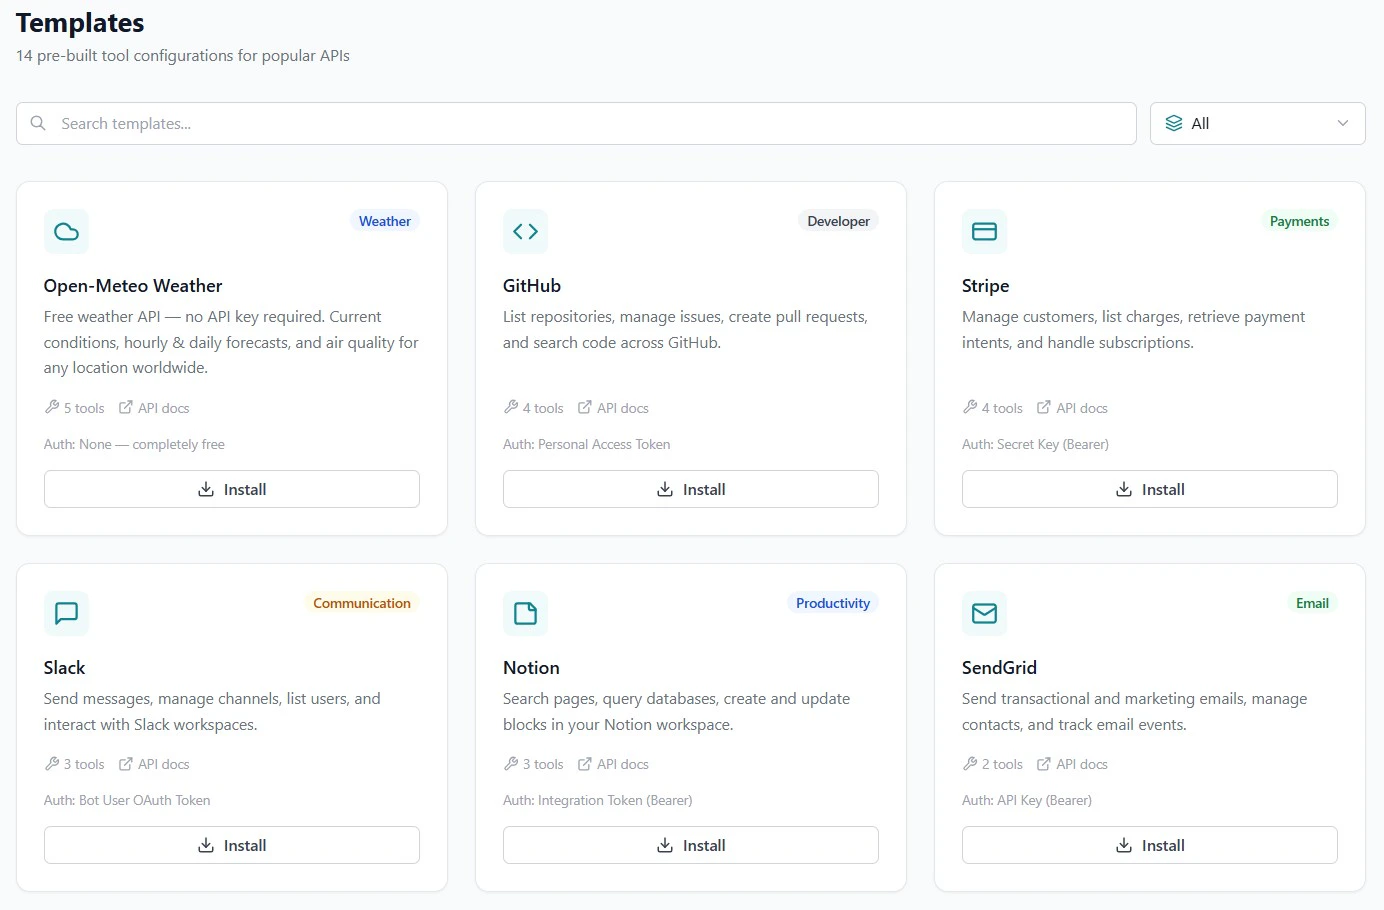
How Installation Works
Installing a template runs two steps automatically:- A new server is created named after the template (e.g., “Stripe”, “GitHub”). This gives each template its own isolated MCP endpoint.
- All tools are bulk-created inside that server — pre-configured with endpoints, parameter definitions, and response mappings.
Installing the same template twice creates two separate servers. It never overwrites an existing one.
Available Templates
GetMCP ships with 14 pre-built templates across 9 categories:| Template | Category | Tools | Auth Required |
|---|---|---|---|
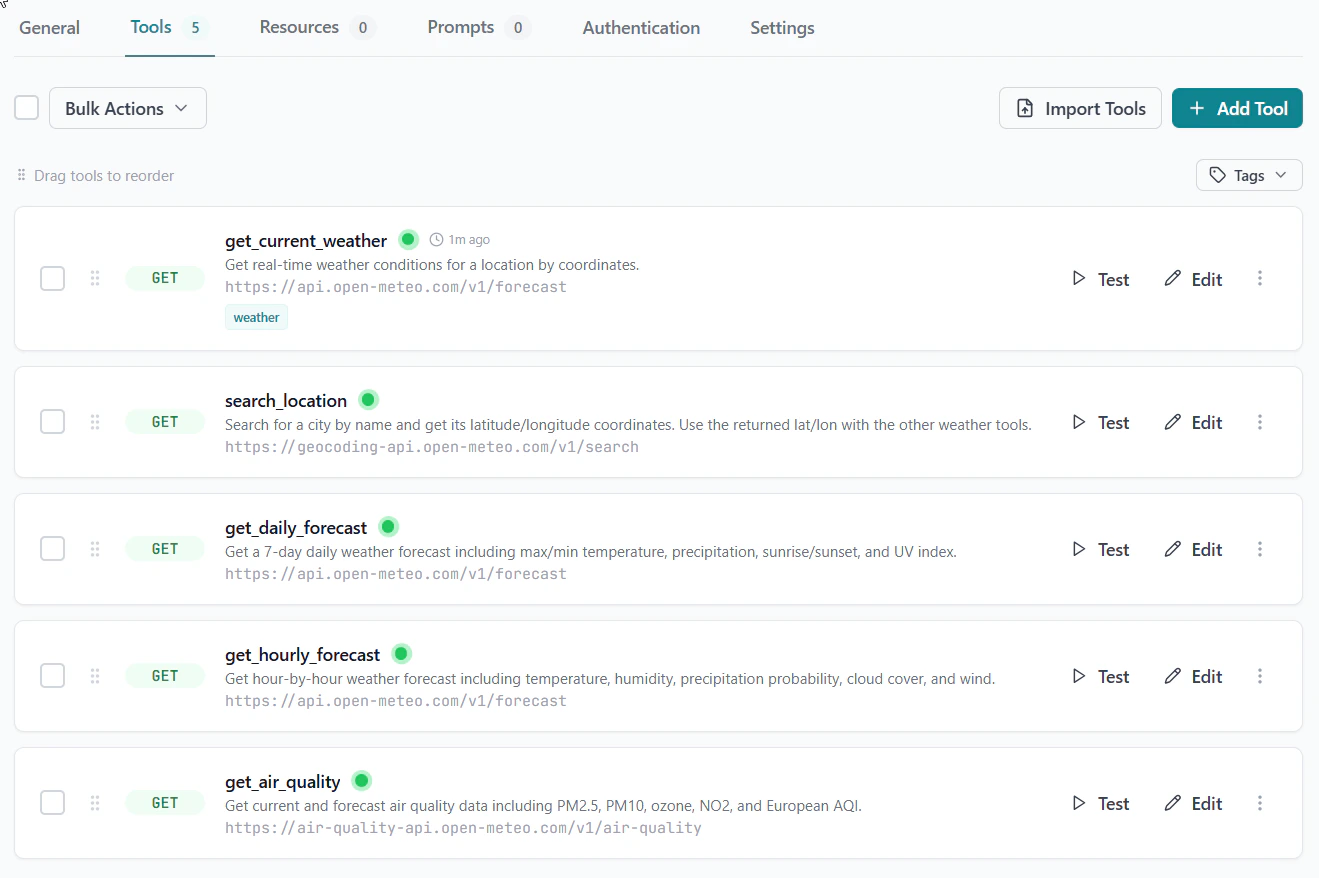
| Open-Meteo Weather | Weather | 5 | None — completely free |
| GitHub | Developer | 4 | Personal Access Token |
| Stripe | Payments | 4 | Secret Key (Bearer) |
| Slack | Communication | 3 | Bot User OAuth Token |
| Notion | Productivity | 3 | Integration Token (Bearer) |
| SendGrid | 2 | API Key (Bearer) | |
| Twilio | Communication | 2 | Account SID + Auth Token (Basic) |
| HubSpot | CRM | 3 | Private App Token (Bearer) |
| WordPress | CMS | 4 | Application Password (Basic) |
| WooCommerce | E-commerce | 5 | Consumer Key + Secret (Basic) |
| Google Calendar | Productivity | 4 | OAuth 2.0 Access Token |
| Airtable | Productivity | 3 | Personal Access Token (Bearer) |
| Amadeus Travel | Travel | 3 | OAuth 2.0 Bearer Token |
| Mailchimp | 3 | API Key (Basic auth) |
Browsing Templates
In the GetMCP admin sidebar, click Templates. Use the search bar to find by name or category, or use the category dropdown to filter by type (Weather, Developer, Payments, etc.). Each card shows the service icon, category badge, description, number of tools included, a link to the official API docs, and the authentication method required.Installing a Template
Review the tools included
The modal lists every tool that will be created — tool names and descriptions — so you know exactly what you’re getting before committing.
Read the auth instructions
Below the tool list, GetMCP shows step-by-step instructions for obtaining your API credentials for that specific service, with a direct link to that service’s credentials dashboard.
- For free APIs (like Open-Meteo), a green banner confirms no credentials are needed.
- For authenticated APIs, an amber panel walks you through exactly where to get your key.
Click Install Template
Click Install Template. GetMCP automatically: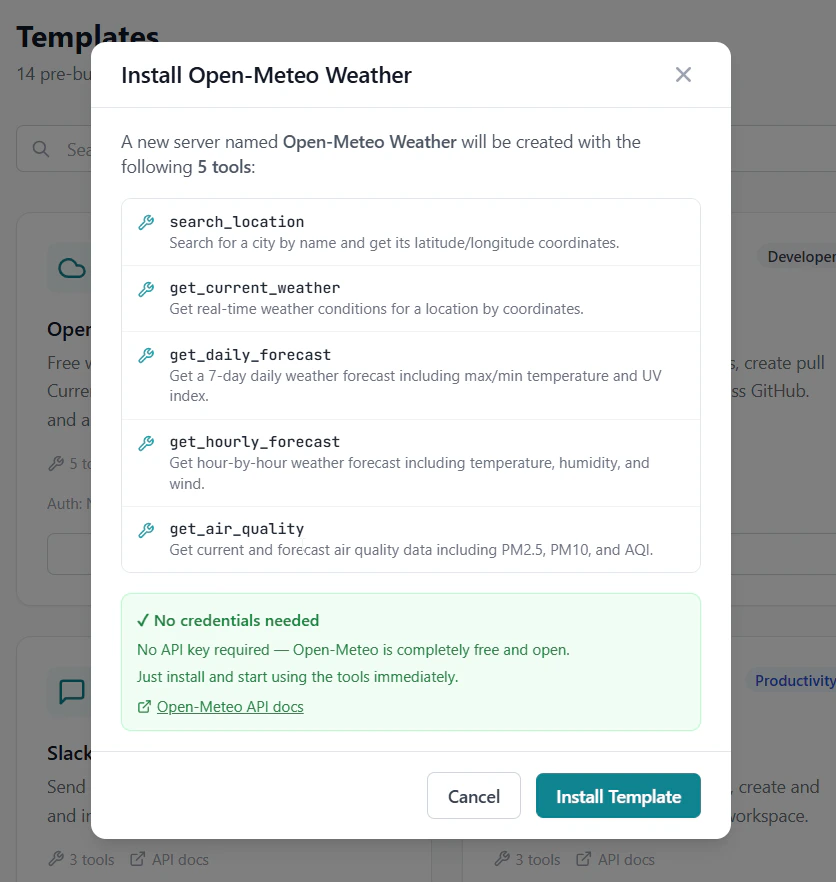
- Creates a new server named after the template
- Creates all included tools inside that server
Template installed successfully
A success banner confirms how many tools were created and which server they were added to.
Setting Up Authentication After Install
Most templates require your API credentials before tools can execute. After installing, the server’s Authentication tab is where you enter them.Open the Authentication tab
You land here directly if you clicked Go to Authentication Settings in the install modal. You can also reach it from the server detail page.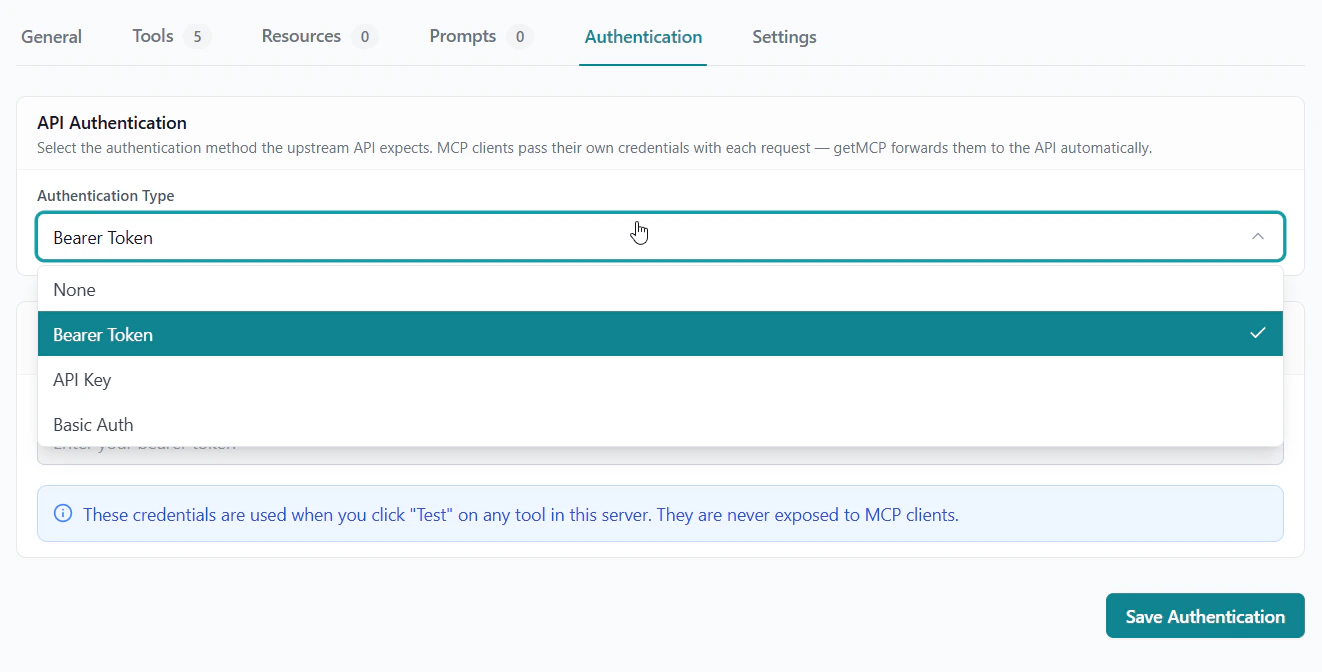
Enter your credentials
Each template requires a different credential format. Refer to the auth instructions shown in the install modal (or visit the service’s docs directly). Common formats:
| Auth Type | Example credential field |
|---|---|
| Bearer Token | sk_live_xxxxxxxxxxxxx (Stripe), xoxb-xxxxx (Slack) |
| API Key | Your API key string |
| Basic Auth | username:password or consumer_key:consumer_secret |
| OAuth 2.0 | Access token generated via the service’s OAuth flow (e.g., Google OAuth Playground). Tokens expire — re-enter a fresh token when the old one stops working. |
Credentials you enter here are your credentials for the external API (e.g., your Stripe key). AI clients connecting to your MCP server use a separate GetMCP API key to authenticate with the server — they never see your external API credentials.
Testing After Install
Once credentials are saved, verify your tools work using the built-in test panel or MCP Inspector.Quick Test via Admin Panel
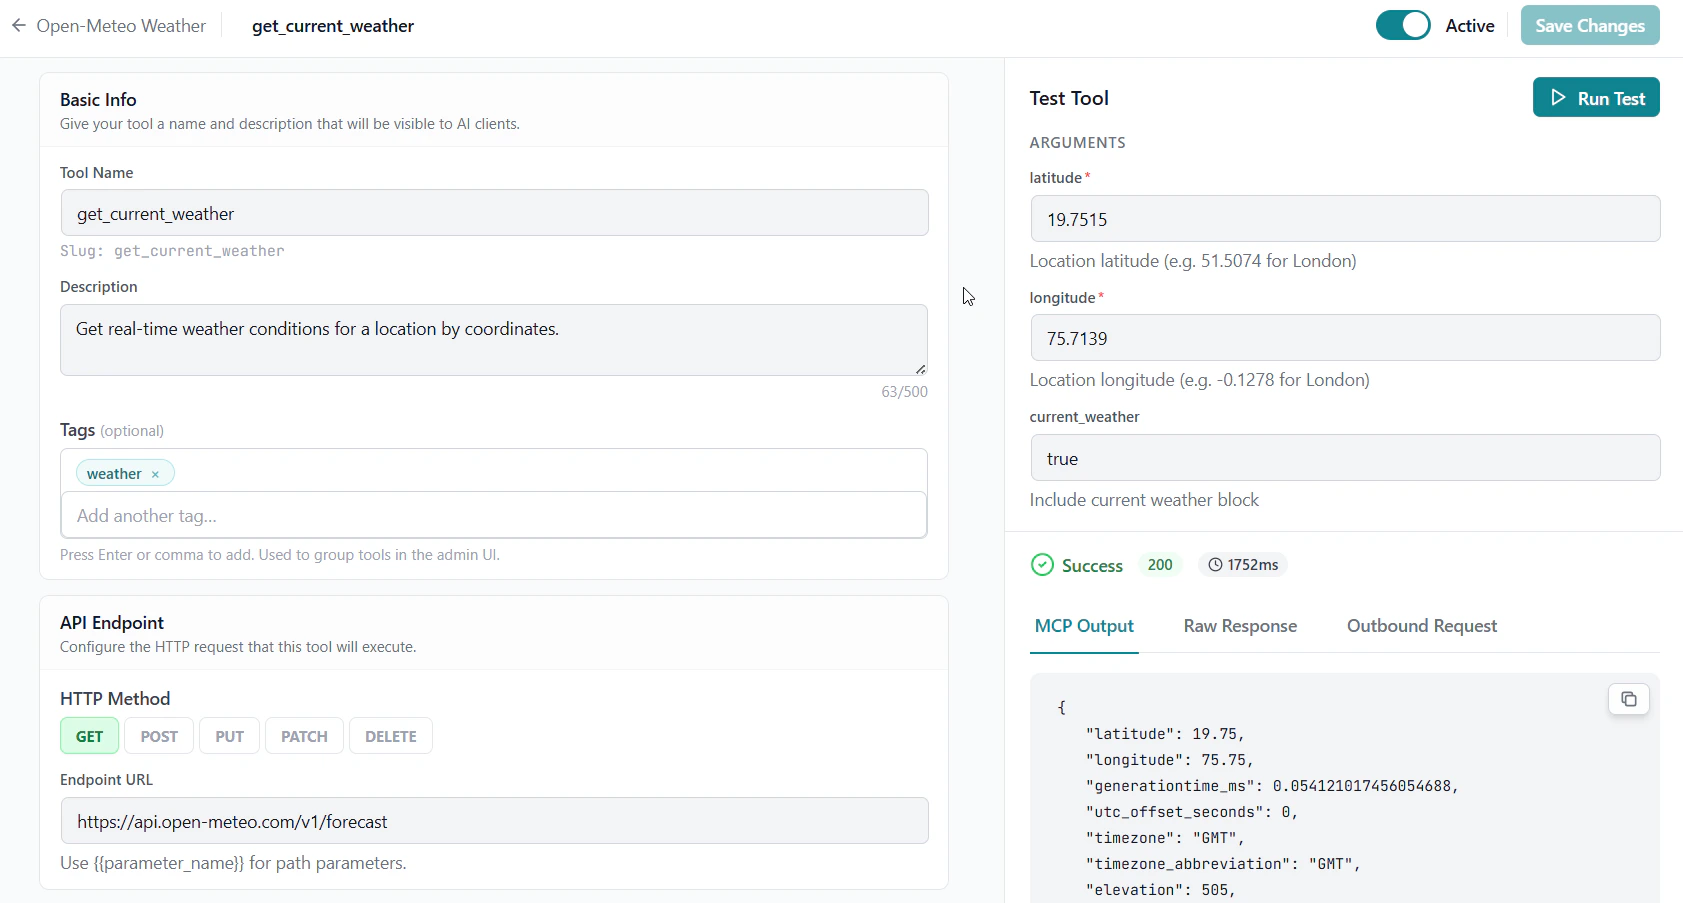
Test via MCP Inspector
Connect the MCP Inspector to your server URL, navigate to the Tools tab, and call any tool interactively.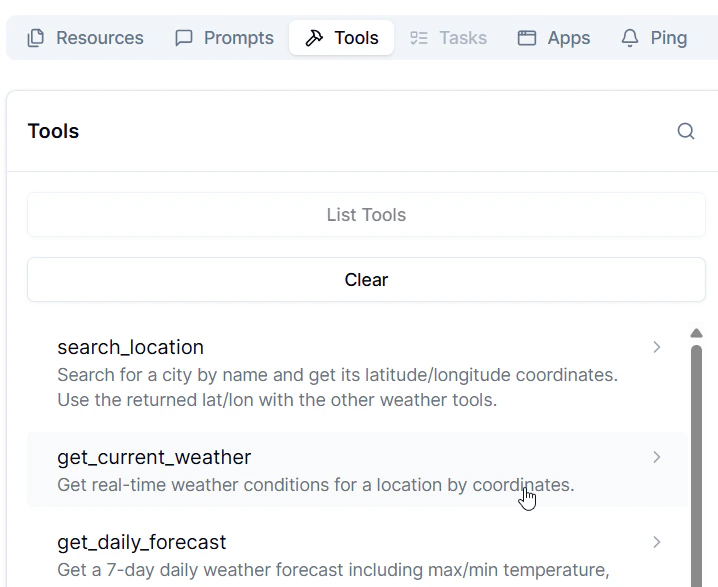
Customizing an Installed Template
Templates are a starting point. Every generated tool can be freely edited — parameters, endpoint URLs, response mappings, timeouts, and more.Click Edit on any tool
Open a tool — the editor shows the pre-filled configuration (endpoint URL, parameters, response mappings) that the template generated. Modify any field as needed.
Troubleshooting
Install failed — tools could not be created
Install failed — tools could not be created
A warning toast shows which specific tools failed. This is rare and usually means the template data was malformed. Try uninstalling (deleting the server) and re-installing the template.
Tools created but API calls return 401 Unauthorized
Tools created but API calls return 401 Unauthorized
Tools return 403 Forbidden
Tools return 403 Forbidden
Your credentials are valid but lack the required permissions/scopes. Return to the service’s credentials dashboard and ensure the token has the necessary scopes (e.g., Slack bot scopes, GitHub repo access, Stripe permissions). Then generate a new token and update it in the Authentication tab.
Open-Meteo tools return no data
Open-Meteo tools return no data
Open-Meteo tools require valid latitude/longitude coordinates or a city name depending on the tool. Use
search_location first to get coordinates, then pass them to get_current_weather or forecast tools.Google Calendar token expired
Google Calendar token expired
Google OAuth access tokens expire after 1 hour. Generate a new access token via the OAuth 2.0 Playground and update it in the Authentication tab.