What is a Server?
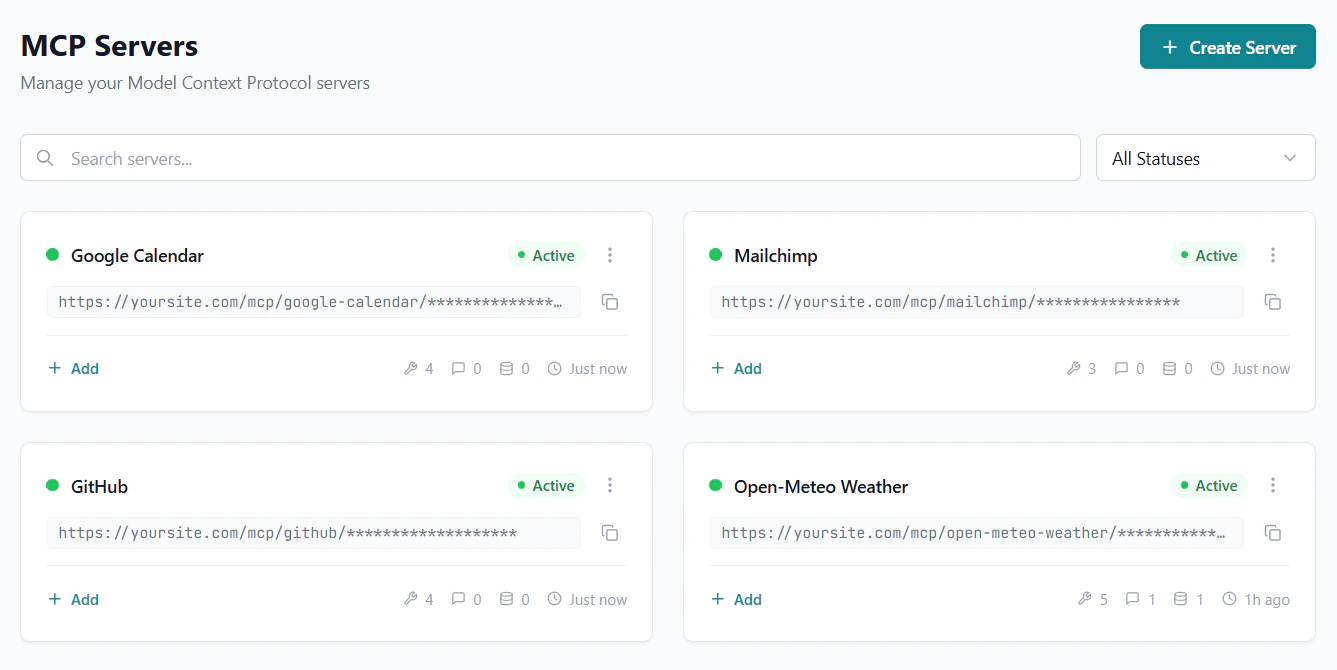
An MCP server in GetMCP is a named container that groups related tools, resources, and prompts together. Each server gets a unique public URL that AI clients connect to via the MCP protocol. Think of a server as a “workspace” for a specific domain or purpose:- A Stripe server with tools for payments, customers, and subscriptions
- A GitHub server with tools for repos, issues, and pull requests
- An Internal CRM server with tools for your company’s custom CRM API
Server URL Structure
Each server gets a unique endpoint URL:
- slug — A human-readable identifier derived from the server name (e.g.,
my-stripe-tools)
Server Properties
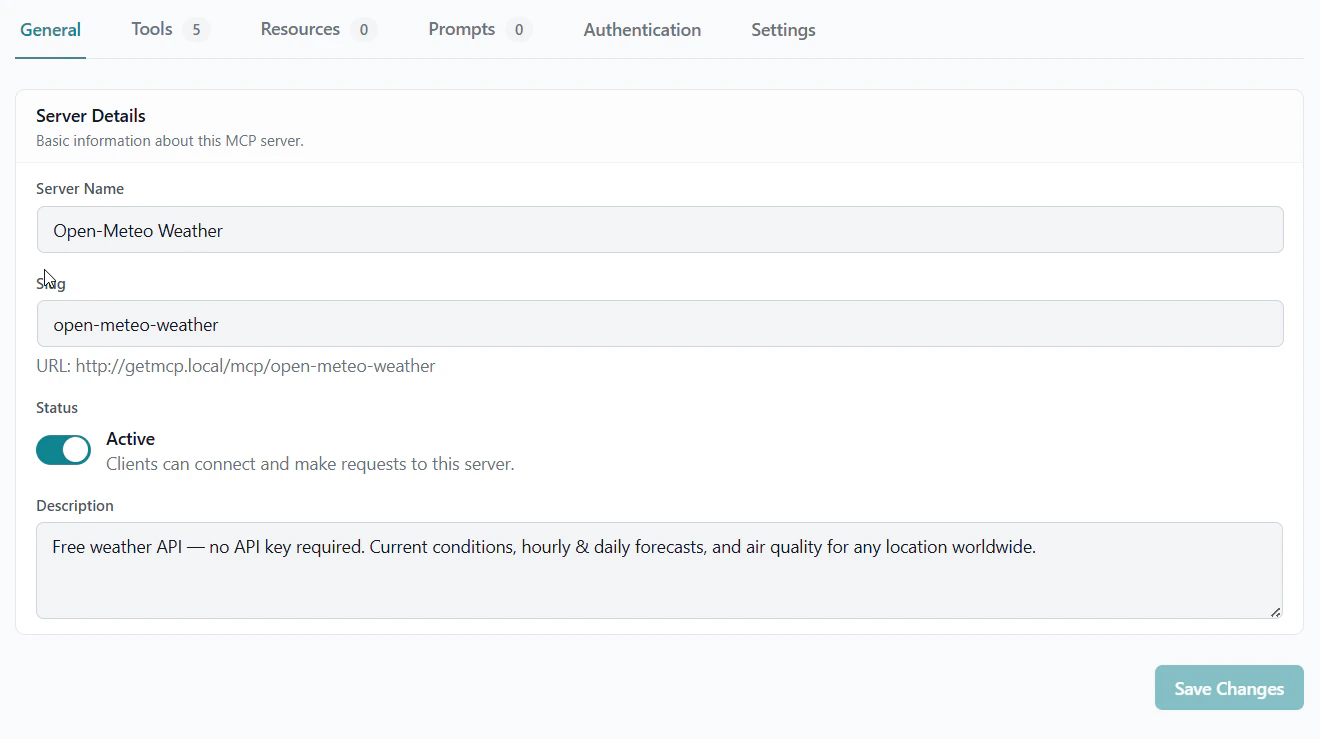
| Property | Description |
|---|---|
| Name | Human-readable label displayed in the admin and sent to AI clients |
| Slug | URL path segment; auto-generated from name, must be unique |
| Status | active, paused, or draft |
| Auth Type | Inbound authentication method for protecting the MCP endpoint |
| Transport | Always streamable-http (JSON-RPC 2.0 over HTTP) |
| Rate Limit | Maximum requests per minute (default: 60) |
| CORS Origins | Comma-separated list of allowed origins for browser clients |
Server Status
| Status | Description |
|---|---|
active | Accepting MCP connections; tools are callable |
paused | Returns HTTP 503 to AI clients; configuration preserved |
draft | Not yet published; not accessible via MCP endpoint |
Authentication Tab
The Authentication tab on the server detail page has two independent sections:Inbound Authentication
Controls who can connect to your MCP server. Configure this under Authentication → Auth Type:| Auth Type | What the connecting client must send |
|---|---|
none | Nothing extra — the server URL alone grants access |
bearer-token | Authorization: Bearer <token> header |
api-key | Authorization: <api-key> header |
basic-auth | HTTP Basic credentials (username + password) |
oauth | Browser-based OAuth flow (no static credential) |
headers block when connecting.
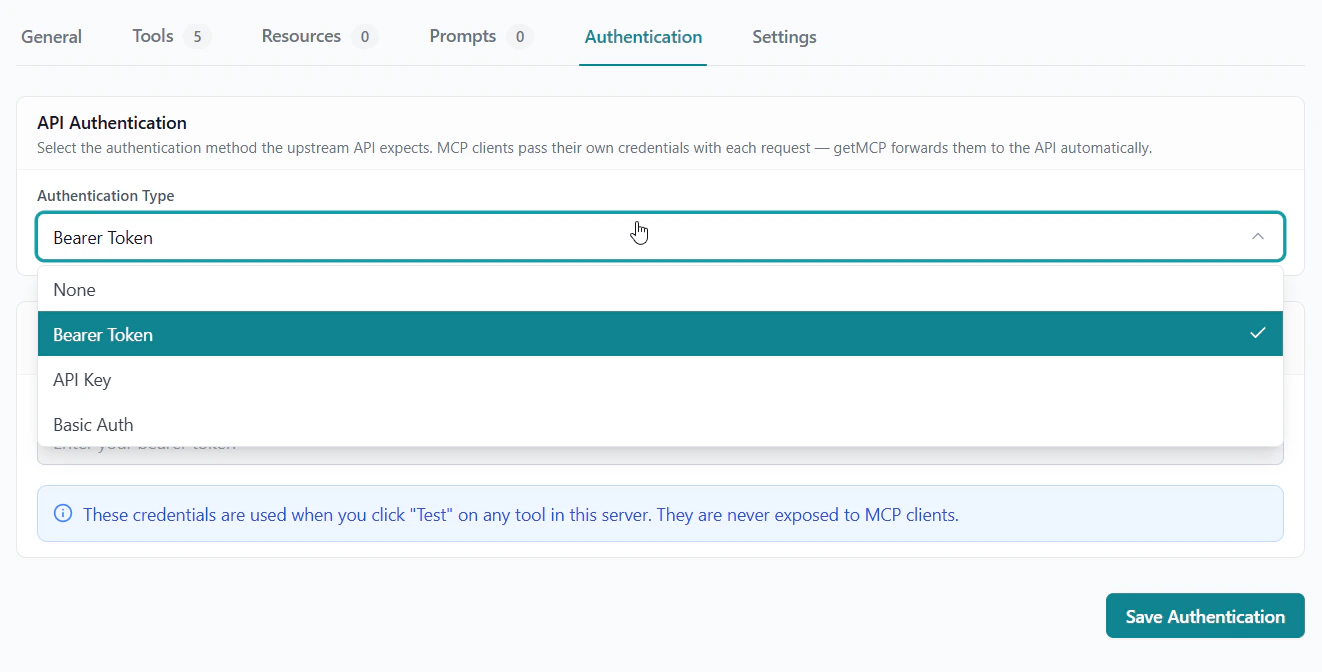
Inbound authentication protects access to GetMCP itself. It is completely separate from the API credentials your tools use when calling external services. See the Authentication Guide for a full explanation.
Test Credentials
The Test Credentials section (lower half of the Authentication tab) is a separate set of outbound API credentials used only when you click Test on a tool in the admin panel.| Field | Description |
|---|---|
| Auth Type | The auth method for your external API (bearer-token, api-key, basic-auth) |
| Credential | The actual API key or token for your test/staging environment |
- Use a sandbox or staging API key during development
- Keep production credentials completely out of the admin test flow
- Rotate dev keys freely without touching production
Test credentials are never used by AI clients. When Claude, Cursor, or any other client calls a tool, GetMCP always uses configured production credentials on the MCP client — not these test credentials.
Creating a Server
Configure Authentication (optional)
Open the Authentication tab to set inbound auth type and test credentials. You can skip this for now and configure it later.
Multi-Server Architecture
You can create as many servers as you need from a single WordPress installation. This lets you:- Organize by domain: separate servers for different APIs or clients
- Segment by access level: different API keys for different servers
- Isolate environments: separate staging and production server configs