> ## Documentation Index
> Fetch the complete documentation index at: https://docs.getmcp.com/llms.txt
> Use this file to discover all available pages before exploring further.
# Quick Start
> Create your first MCP server and connect an AI client in under 5 minutes.
## Prerequisites
* WordPress 6.2+ with PHP 8.0+
* GetMCP plugin installed and activated ([Installation Guide](/docs/installation))
* An API you want to expose (or use a pre-built template for testing)
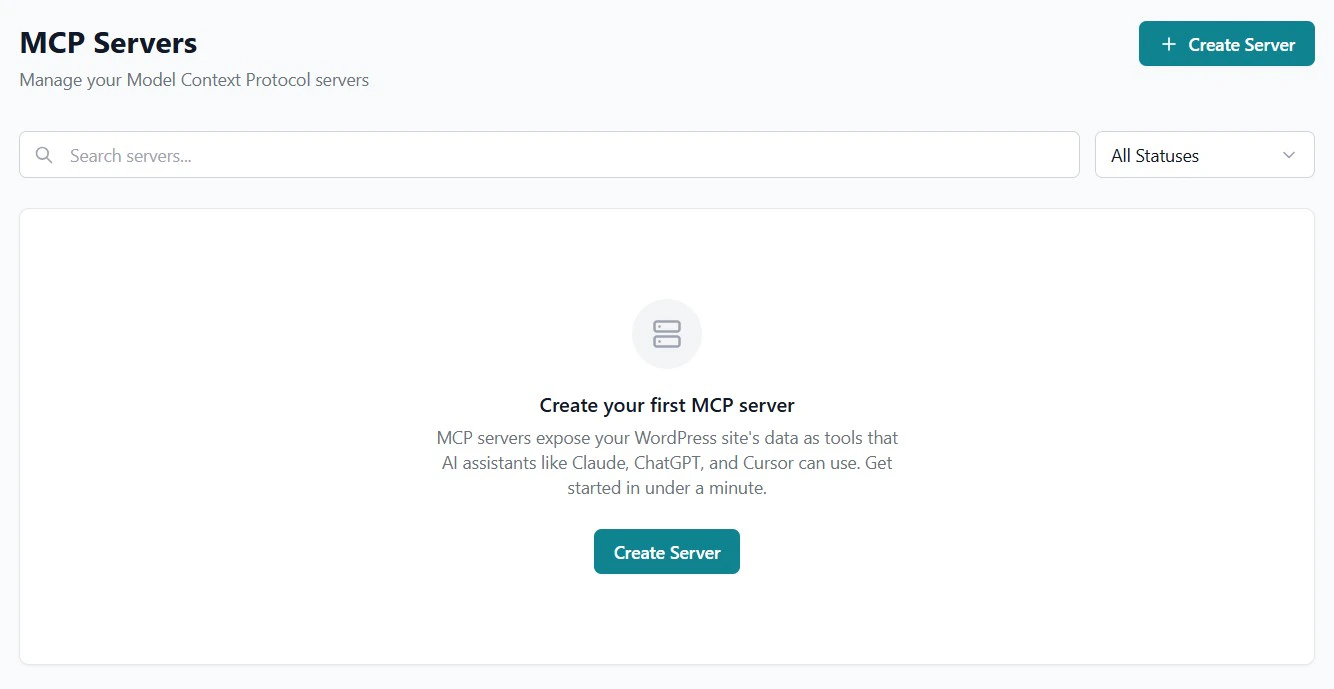
## Step 1: Create a Server
In your WordPress admin sidebar, click **GetMCP** to open the dashboard.
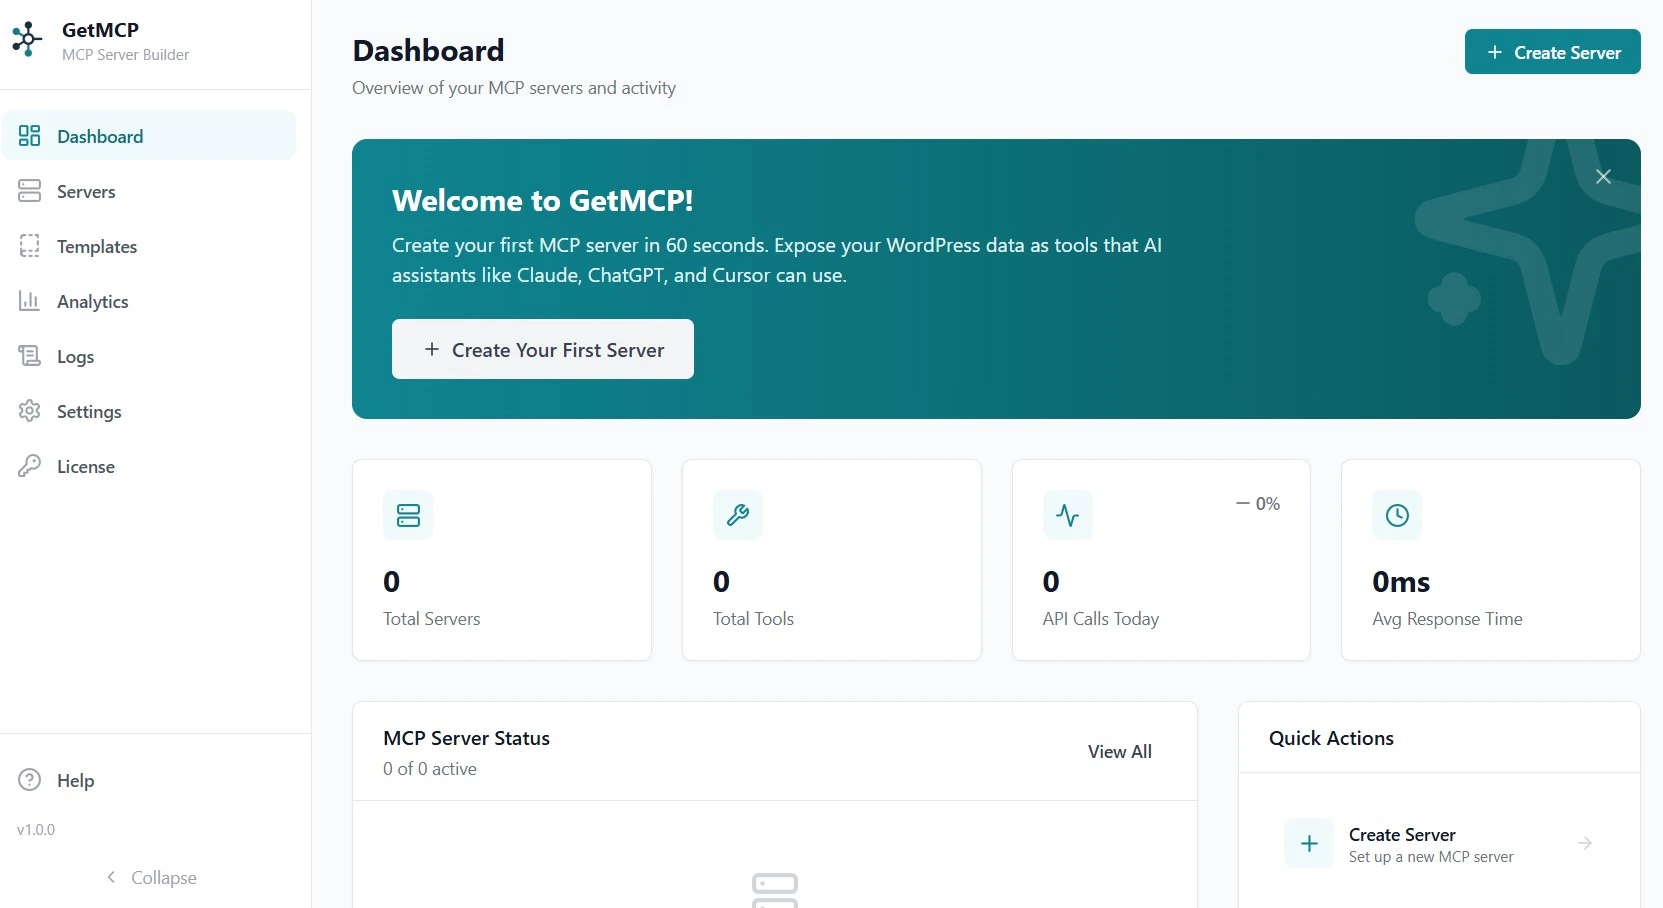 Click the **Create Server** button in the top right corner.
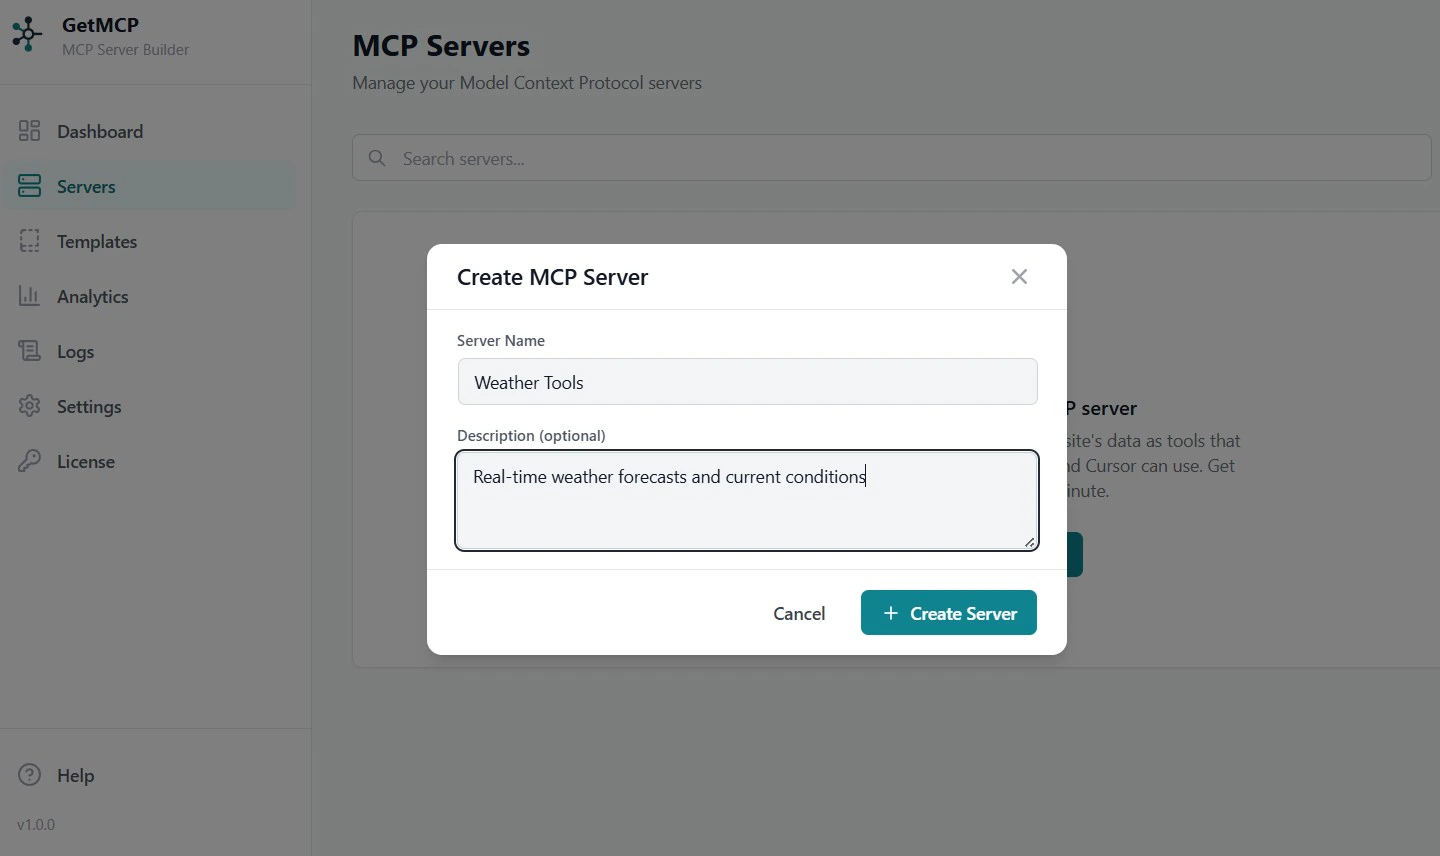
 Enter a **Name** (e.g., `My Weather`) and Description (optional). The slug and server ID are auto-generated.
Click **Create** to save.
Enter a **Name** (e.g., `My Weather`) and Description (optional). The slug and server ID are auto-generated.
Click **Create** to save.
 ## Step 2: Add a Tool
Inside your new server, click the **Tools** tab.
Click **Add Tool** to open the tool editor.
## Step 2: Add a Tool
Inside your new server, click the **Tools** tab.
Click **Add Tool** to open the tool editor.
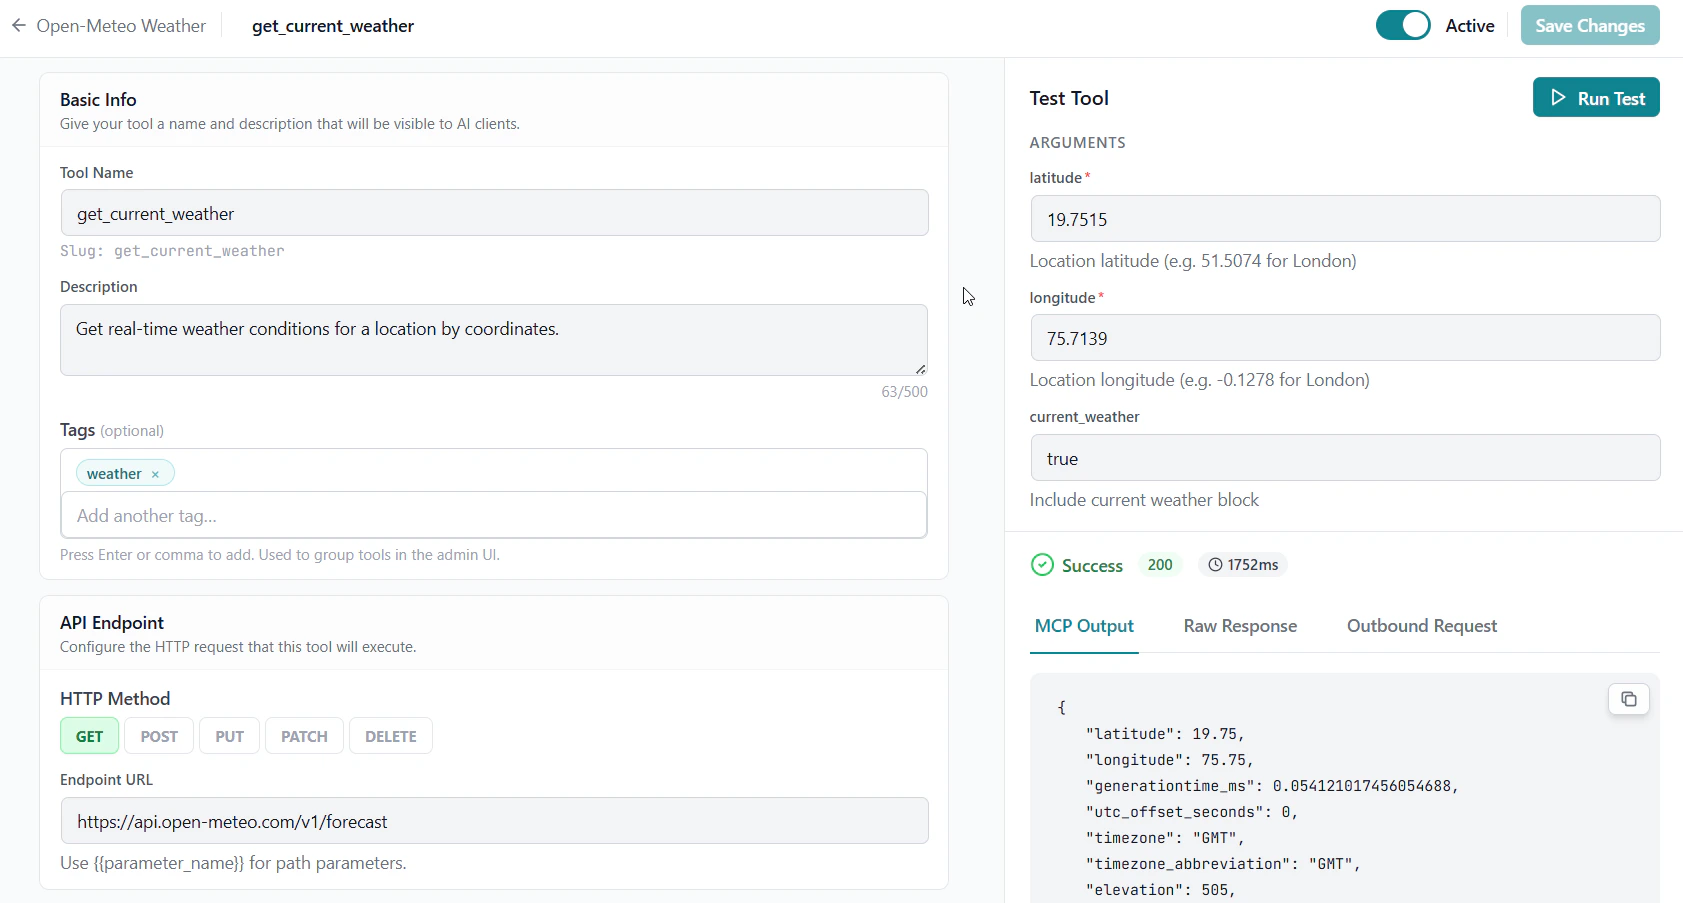
 Fill in the tool details:
* **Name**: `get_current_weather` (use snake\_case — this is how AI clients call it)
* **Description**: `Get real-time weather conditions for a location by coordinates`
* **Endpoint URL**: `https://api.open-meteo.com/v1/forecast`
* **HTTP Method**: `GET`
Fill in the tool details:
* **Name**: `get_current_weather` (use snake\_case — this is how AI clients call it)
* **Description**: `Get real-time weather conditions for a location by coordinates`
* **Endpoint URL**: `https://api.open-meteo.com/v1/forecast`
* **HTTP Method**: `GET`
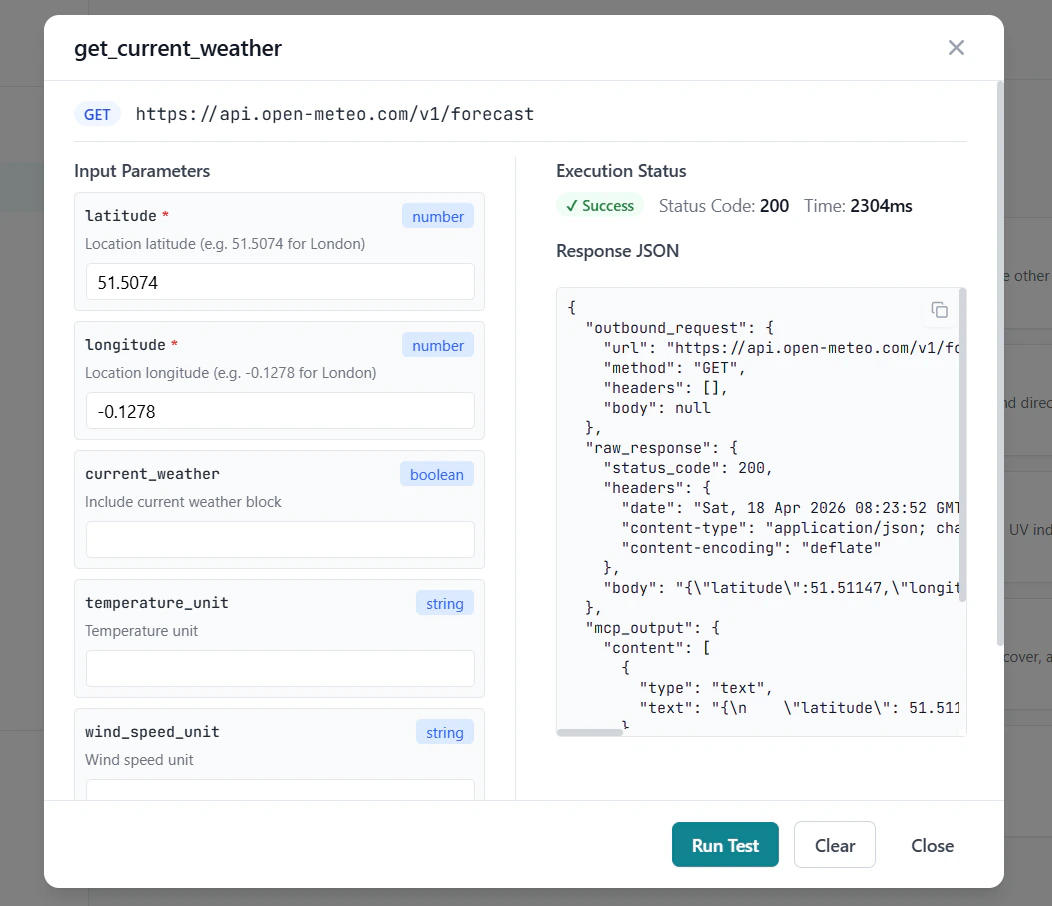
 In the **Input Schema** section, add three parameters:
| Name | Type | Required | Description | Mapping |
| ----------------- | --------- | -------- | ------------------------------------ | ------- |
| `latitude` | `number` | Yes | `Latitude of the location` | Query |
| `longitude` | `number` | Yes | `Longitude of the location` | Query |
| `current_weather` | `boolean` | No | `Include current weather conditions` | Query |
All three map as **Query** parameters — they are appended to the URL as `?latitude=...&longitude=...¤t_weather=true`.
Click **Save Tool**. Your tool is now configured.
## Step 3: Test the Tool
Before connecting an AI client, verify the tool works correctly.
On the tool row, click the **Test** button.
In the test panel, enter the following as the arguments (London coordinates):
```json theme={null}
{
"latitude": 51.5085,
"longitude": -0.1257,
"current_weather": true
}
```
Click **Run Test**. You should see the weather data returned from the API.
In the **Input Schema** section, add three parameters:
| Name | Type | Required | Description | Mapping |
| ----------------- | --------- | -------- | ------------------------------------ | ------- |
| `latitude` | `number` | Yes | `Latitude of the location` | Query |
| `longitude` | `number` | Yes | `Longitude of the location` | Query |
| `current_weather` | `boolean` | No | `Include current weather conditions` | Query |
All three map as **Query** parameters — they are appended to the URL as `?latitude=...&longitude=...¤t_weather=true`.
Click **Save Tool**. Your tool is now configured.
## Step 3: Test the Tool
Before connecting an AI client, verify the tool works correctly.
On the tool row, click the **Test** button.
In the test panel, enter the following as the arguments (London coordinates):
```json theme={null}
{
"latitude": 51.5085,
"longitude": -0.1257,
"current_weather": true
}
```
Click **Run Test**. You should see the weather data returned from the API.
 ## Step 4: Connect an AI Client
On the server detail page, find the **Server URL** shown at the top. It looks like:
```
https://yoursite.com/mcp/{server-slug}
```
Copy this URL. You can also click **How to connect** on the server detail page to get a pre-filled config snippet for your client.
## Step 4: Connect an AI Client
On the server detail page, find the **Server URL** shown at the top. It looks like:
```
https://yoursite.com/mcp/{server-slug}
```
Copy this URL. You can also click **How to connect** on the server detail page to get a pre-filled config snippet for your client.
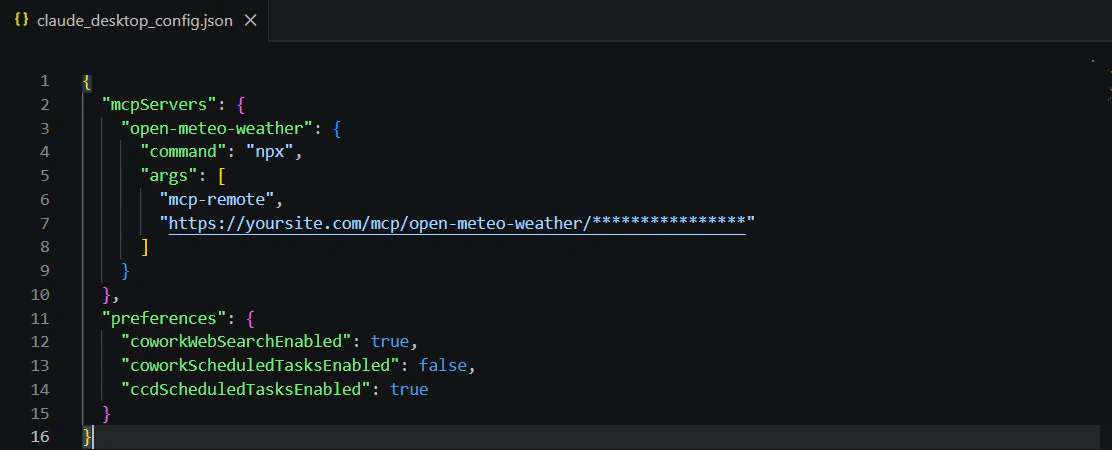 Open Developer Settings and click **Edit Config**:
* **macOS:** Menu bar → Claude → Settings → Developer → Edit Config
* **Windows:** Breadcrumb menu (top bar) → File → Settings → Developer → Edit Config
**macOS / Linux:**
```json theme={null}
{
"mcpServers": {
"{server-slug}": {
"command": "npx",
"args": [
"mcp-remote",
"https://yoursite.com/mcp/{server-slug}"
]
}
}
}
```
**Windows:**
```json theme={null}
{
"mcpServers": {
"{server-slug}": {
"command": "cmd",
"args": [
"/c",
"npx",
"mcp-remote",
"https://yoursite.com/mcp/{server-slug}"
]
}
}
}
```
Fully quit and restart Claude Desktop — closing the window is not enough.
Open your terminal and run:
```bash theme={null}
claude mcp add --transport http {server-slug} https://yoursite.com/mcp/{server-slug}
```
The server is added immediately — no restart needed. Run `/mcp` to verify it appears.
Go to **Settings → Tools & MCP → Add a custom MCP**. In the `mcp.json` file that opens, add:
```json theme={null}
{
"mcpServers": {
"{server-slug}": {
"url": "https://yoursite.com/mcp/{server-slug}"
}
}
}
```
Restart Cursor after saving.
Go to **Settings → Cascade → Open MCP Registry**. In the `mcp_config.json` file that opens, add:
```json theme={null}
{
"mcpServers": {
"{server-slug}": {
"serverUrl": "https://yoursite.com/mcp/{server-slug}"
}
}
}
```
Restart Windsurf after saving.
Open (or create) `.vscode/mcp.json` in your project root and add:
```json theme={null}
{
"servers": {
"{server-slug}": {
"type": "http",
"url": "https://yoursite.com/mcp/{server-slug}"
}
}
}
```
Save — VS Code detects the file automatically, no restart needed.
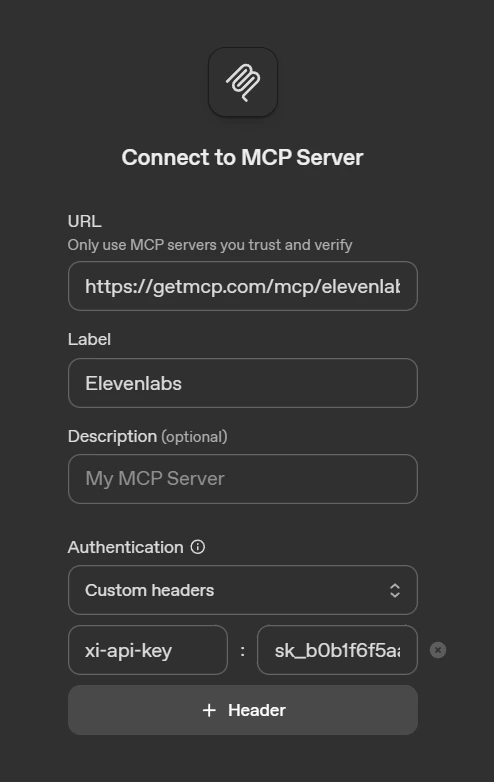
1. Go to [platform.openai.com/playground/prompts](https://platform.openai.com/playground/prompts)
2. Click the **tools icon** in the left panel → **Add MCP server**
3. Enter your server URL and a label name, then click **Connect**
Open Developer Settings and click **Edit Config**:
* **macOS:** Menu bar → Claude → Settings → Developer → Edit Config
* **Windows:** Breadcrumb menu (top bar) → File → Settings → Developer → Edit Config
**macOS / Linux:**
```json theme={null}
{
"mcpServers": {
"{server-slug}": {
"command": "npx",
"args": [
"mcp-remote",
"https://yoursite.com/mcp/{server-slug}"
]
}
}
}
```
**Windows:**
```json theme={null}
{
"mcpServers": {
"{server-slug}": {
"command": "cmd",
"args": [
"/c",
"npx",
"mcp-remote",
"https://yoursite.com/mcp/{server-slug}"
]
}
}
}
```
Fully quit and restart Claude Desktop — closing the window is not enough.
Open your terminal and run:
```bash theme={null}
claude mcp add --transport http {server-slug} https://yoursite.com/mcp/{server-slug}
```
The server is added immediately — no restart needed. Run `/mcp` to verify it appears.
Go to **Settings → Tools & MCP → Add a custom MCP**. In the `mcp.json` file that opens, add:
```json theme={null}
{
"mcpServers": {
"{server-slug}": {
"url": "https://yoursite.com/mcp/{server-slug}"
}
}
}
```
Restart Cursor after saving.
Go to **Settings → Cascade → Open MCP Registry**. In the `mcp_config.json` file that opens, add:
```json theme={null}
{
"mcpServers": {
"{server-slug}": {
"serverUrl": "https://yoursite.com/mcp/{server-slug}"
}
}
}
```
Restart Windsurf after saving.
Open (or create) `.vscode/mcp.json` in your project root and add:
```json theme={null}
{
"servers": {
"{server-slug}": {
"type": "http",
"url": "https://yoursite.com/mcp/{server-slug}"
}
}
}
```
Save — VS Code detects the file automatically, no restart needed.
1. Go to [platform.openai.com/playground/prompts](https://platform.openai.com/playground/prompts)
2. Click the **tools icon** in the left panel → **Add MCP server**
3. Enter your server URL and a label name, then click **Connect**
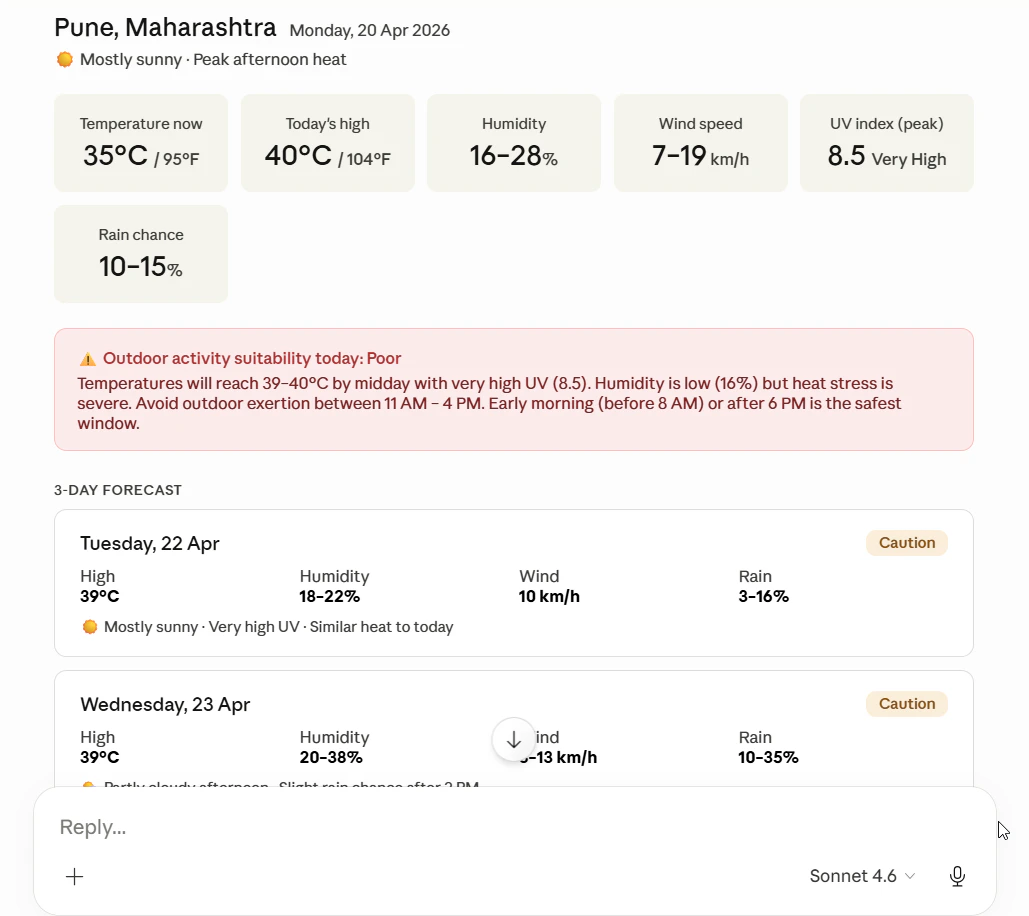
 ## Step 5: Use It
Open your AI client and ask it to use your tool:
> "What's the current weather and 3-days forecast for Pune, Maharashtra, India?"
> The AI will automatically discover and call your `get_current_weather` tool, passing the coordinates as query parameters.
## Step 5: Use It
Open your AI client and ask it to use your tool:
> "What's the current weather and 3-days forecast for Pune, Maharashtra, India?"
> The AI will automatically discover and call your `get_current_weather` tool, passing the coordinates as query parameters.

 ## Next Steps
Secure your tools with API keys and Bearer tokens
Expose static content and reusable prompt templates
Monitor tool usage and performance
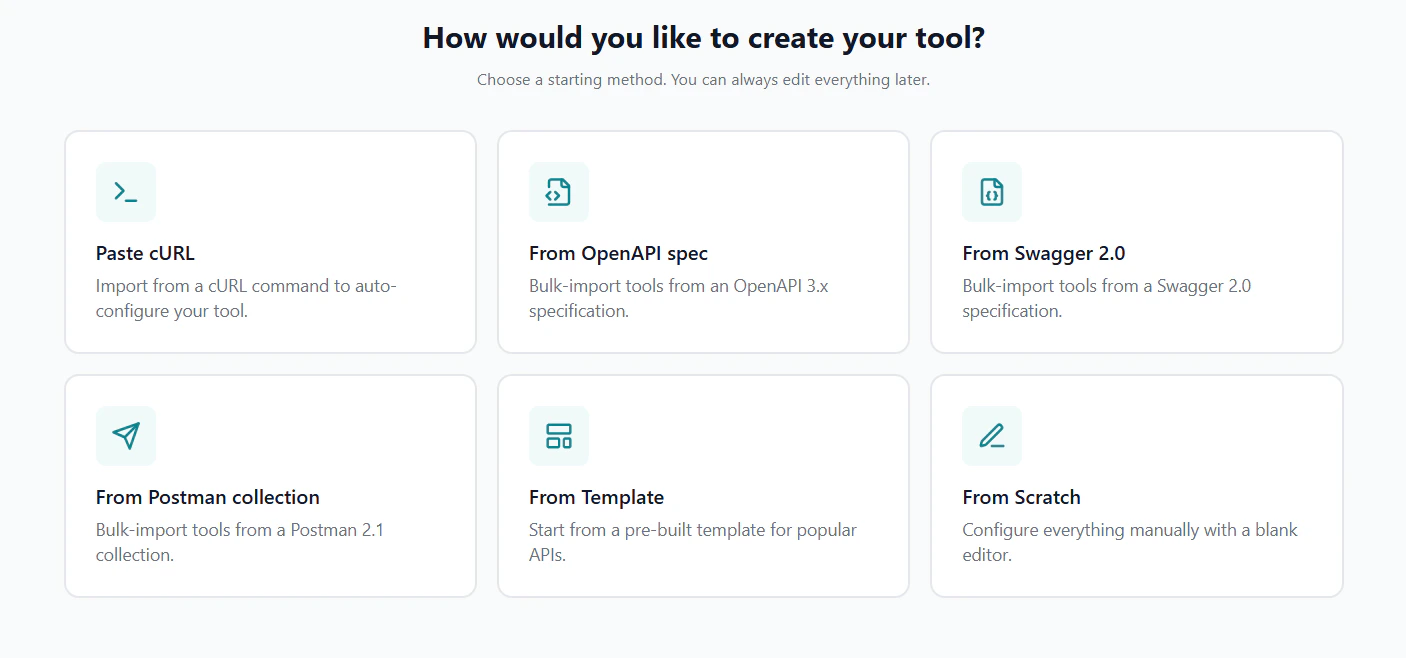
Import existing API calls directly from cURL commands
## Next Steps
Secure your tools with API keys and Bearer tokens
Expose static content and reusable prompt templates
Monitor tool usage and performance
Import existing API calls directly from cURL commands